デザイン作成ツールを使わず、慣れたPowerPointでデザインパーツを作り、画像ファイルとして保存する方法をまとめてみました。
目次
デザイン作成ツールはハードルが高いとき
Canvaなど、無料でもかなりレベルの高いwebデザインのパーツを作ることができるようになっています。
しかし、「そこまでではないけれど、、」、「普段使い慣れないので抵抗が、、」といった場合もあります。
そのような場合には、PowerPointでも画像や文字を編集し、しかもそれをPNGファイルなどの画像ファイルで保存する方法が便利です。
PowerPointの方が使い慣れている場合など、抵抗なく手軽にサムネ画像などのwebデザインパーツを作ることができます。
PowerPointでデザインパーツを作り、画像ファイルとして保存する手順
STEP
PowerPointを立ち上げる
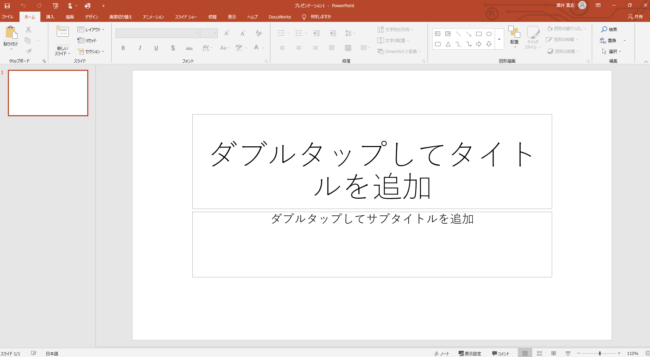
STEP
上のツールバーから「デザイン」タブを選択
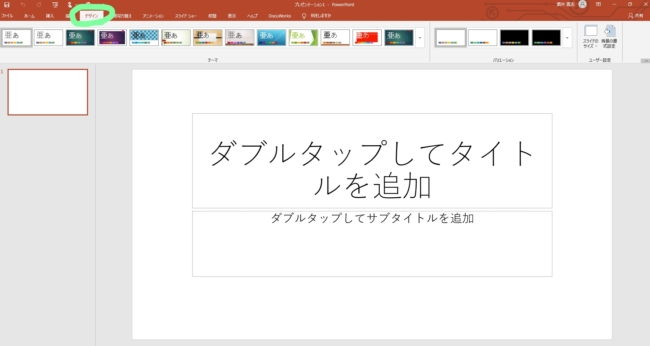
STEP
「スライドのサイズ」から「ユーザー設定のスライドのサイズ」を選択

STEP
「スライドのサイズ指定」で「ユーザー設定」を選択
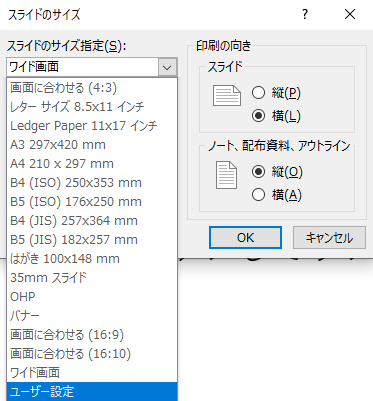
バナーなどであれば、「バナー」などを選択するといいかと思います。
STEP
幅と高さを同じにする(正方形を作成する場合)
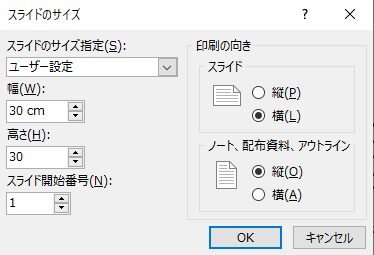
正方形のものを作成したい場合、幅高さを正方形にします。
STEP
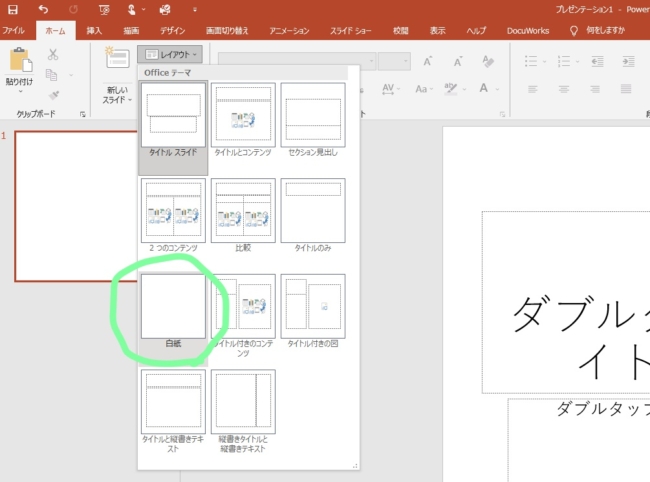
上のツールバー「ホーム」タブの「レイアウト」から、「白紙」を選択
STEP
上のツールバー「挿入」の「画像」から「このデバイス」を選択し、準備していた画像を選択
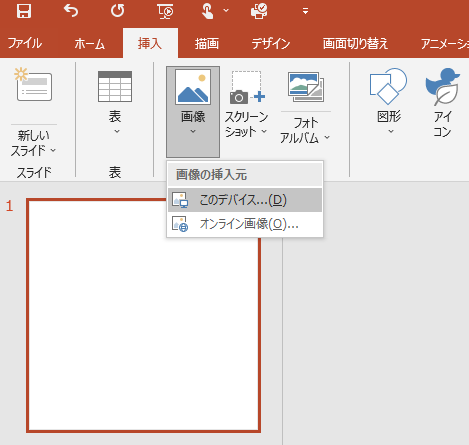
あらかじめ画像ファイルを準備しておく必要があります。
個人的には、Unsplashで探すことが多いです。
Unsplash

Beautiful Free Images & Pictures | Unsplash
Beautiful, free images and photos that you can download and use for any project. Better than any royalty free or stock photos.
STEP
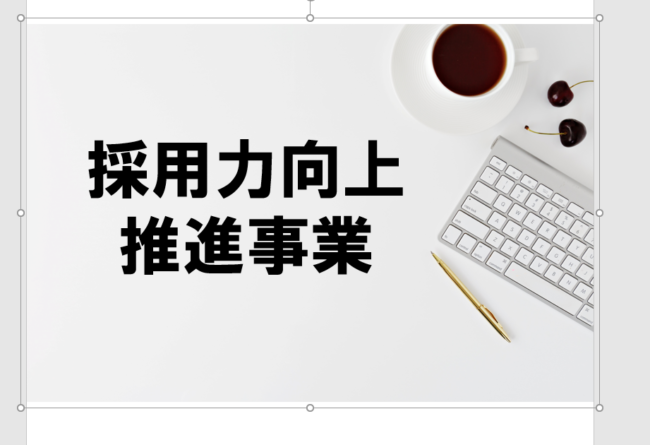
画像が入る

STEP
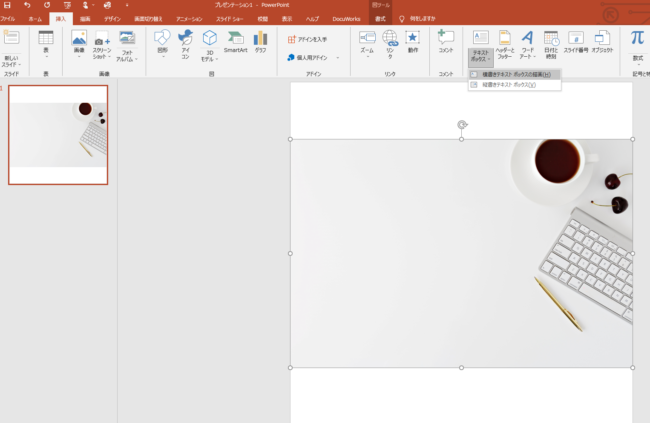
上のツールバー「挿入」の「テキストボックス」からテキストを入力
STEP
フォントを選ぶ
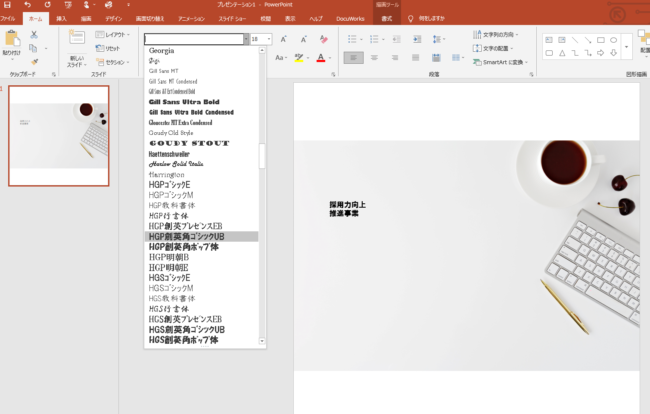
個人的には、「HGP創英角ゴシックUB」を選ぶことが多いです。
STEP
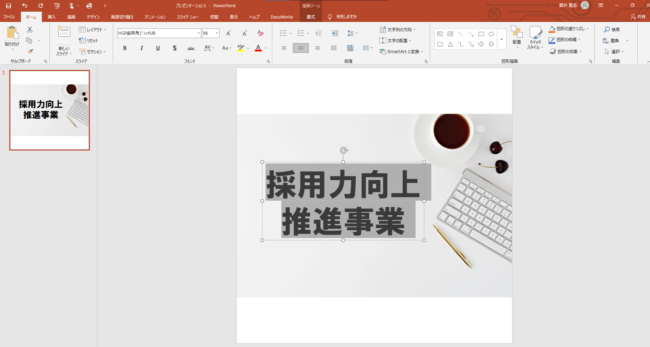
大きさや配置を調整する
STEP
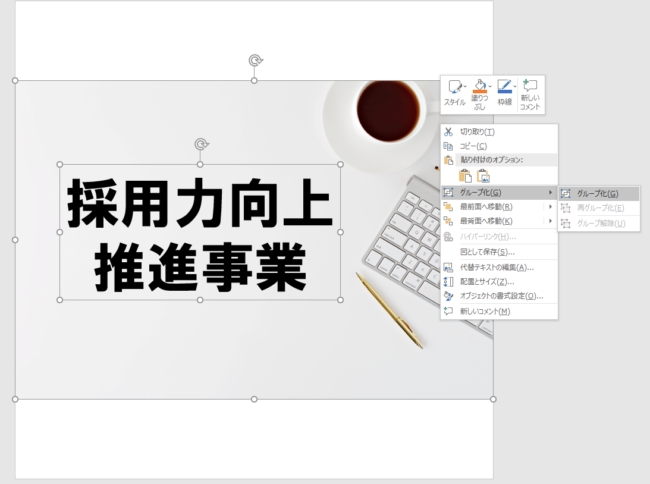
入れた画像とテキストをすべて選択し、右クリックして「グループ化」を選択
STEP
1つの画像ファイルになる
STEP
上のツールバー「名前を付けて保存」を選択、ファイルの種類で「PNG」を選択
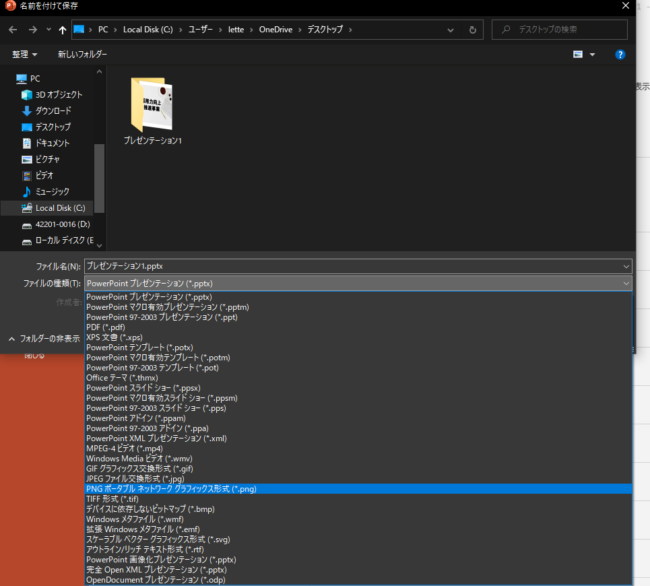
画像ファイルの形式には、PNGのほか、JPEGなどもあります。お好みで。
STEP
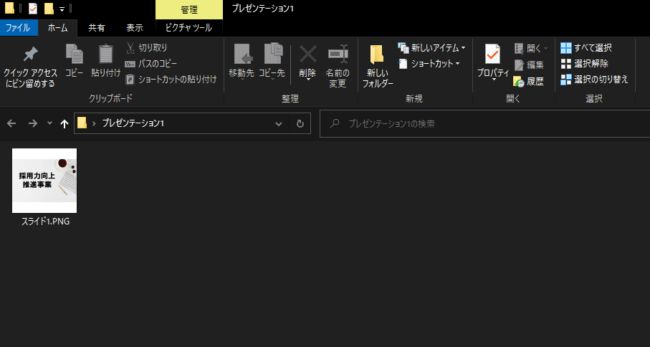
フォルダが出力され、なかにPNGファイル(画像ファイル)が保存される
まとめ
手軽にできるので、これを知ってからは、サムネ画像やプレゼン資料作成などのときのハードルが下がり、色々な場面で使っています。